How to Draw Moving Closet Door on Plan
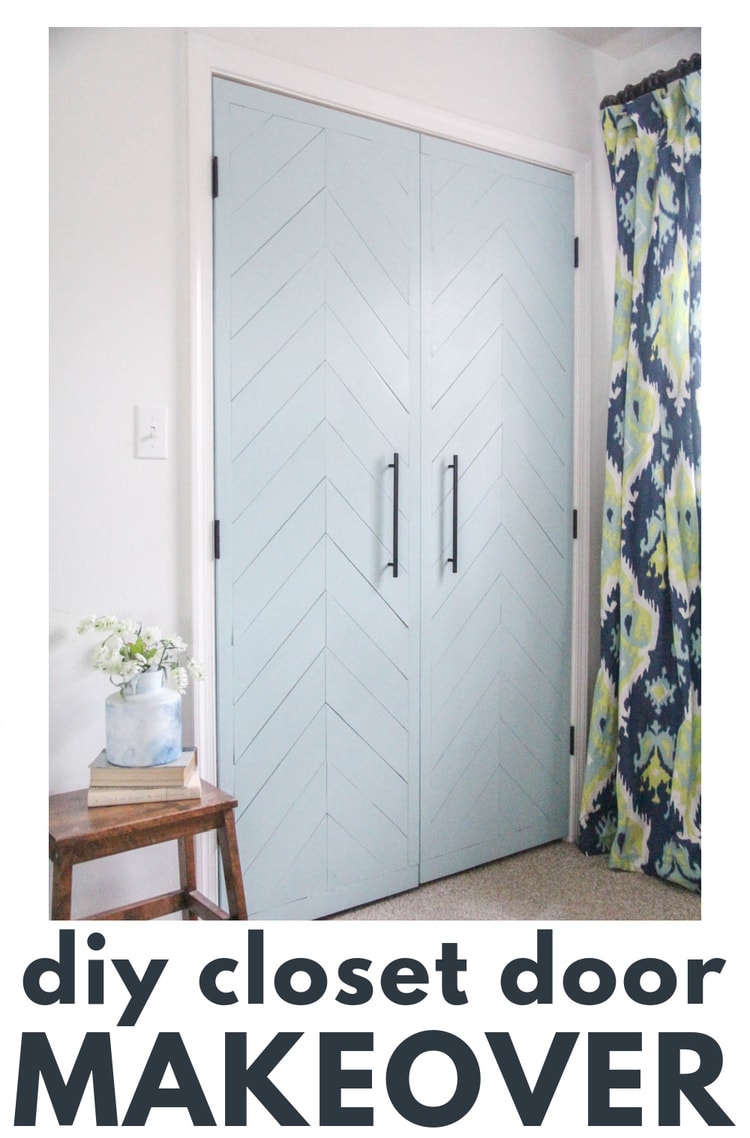
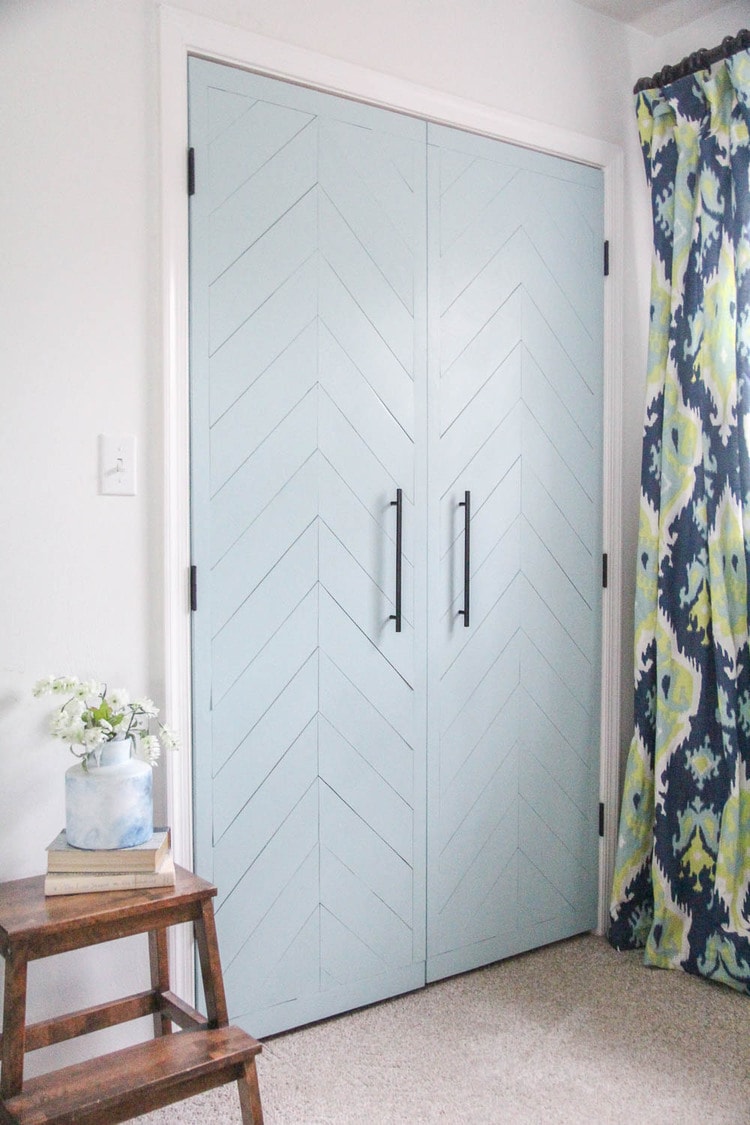
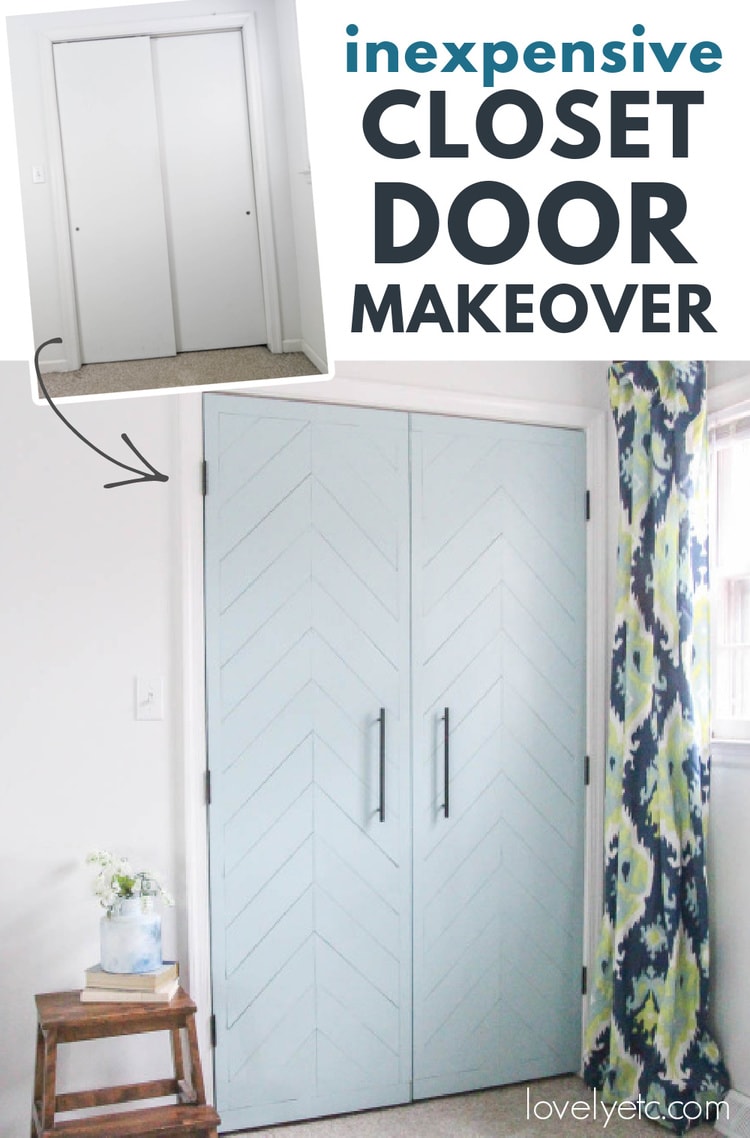
This cheap closet door makeover completely transformed a pair of banal closet doors with chevron wood planks and a fresh coat of paint.
A few days agone I shared the first step in our epic sliding closet door makeover – converting the sliding doors to hinged doors .
That alter made a huge difference in making our closet doors more functional and today I want to share how I also made them beautiful!
The evidently apartment-panel closet doors we had were fine, but they were uncommonly slow and bland. Then I gave them a major update with chevron wood planks and a pretty paint color.
I've been a huge fan of using wood planks to add texture to walls for awhile now. The colorful forest plank wall I added to our foyer and the herringbone wood wall in our principal bath are a few of my favorite projects. So I was instantly onboard for trying a DIY wood planked door.
This project is a scrap time-intensive, but it is very inexpensive and makes a huge impact!
This same method will work well for transforming any flat console door whether its a cupboard door, barn door, or any other interior door.
This post contains affiliate links which means if you brand a buy after clicking a link I will earn a small commission but it won't toll you a penny more than. Click here to run into my full disclosure policy.
Materials
- flat panel door ready for a makeover
- wood to frame the door face – 1/4″ thick ten ii " broad, long plenty to outline each door
- woods for the chevron pattern – 1/4″ thick ten 4″ broad strips
- pencil
- wood gum
- spackling
- 220 dust sandpaper
- paint in the colour of your selection – I used Sherwin Williams 'Watery'
- pigment castor – this is my favorite paint brush for DIY
- cream pigment roller
- door handles – I used this prepare from Amazon which I highly recommend. They look cute and were very affordable.
Tools
- nail gun – this is the 1 I have and dearest. It is easy to use and doesn't crave an air compressor.
- round saw or tabular array saw – for cutting your woods into strips.
- miter saw – for cut the strips at an bending.
- speed foursquare – this is a must-take for creating a make clean chevron design
- record measure out
- directly edge
- utility pocketknife or paint scraper – for getting make clean paint lines betwixt the wood planks
- drill – for attaching the handles
How to Update Doors with Chevron Woods Planks
Choose your Wood
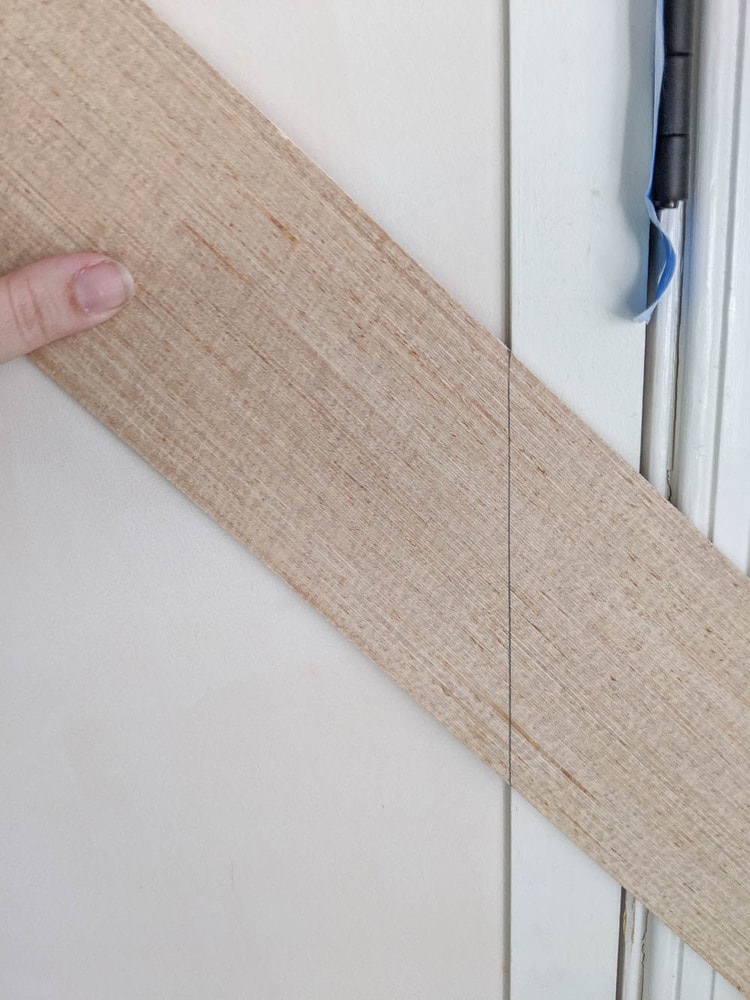
Y'all want to use very thin wood planks for a projection like this; ane/4″ plywood is perfect.
This will help continue the door from getting too heavy and too keeping the wood sparse ensures it won't make it the way of the hinges when the door is fully open.
The most toll-effective option is to buy a big slice of underlayment or other inexpensive plywood and cut information technology into strips yourself.
Underlayment is a thin plywood that is very cheap considering it isn't the highest quality. You won't want to use underlayment for projects you are planning to stain, simply when you are using pigment, it works but fine. I used underlayment for the herringbone wood wall in my bathroom and it worked perfectly.
If you want to save a bit of time, you lot can buy 2″ wide lattice boards for the frame effectually the edges of the door and just use your plywood to create the chevron blueprint. Or if you'd rather proceed costs downward, you tin simply cut everything from the plywood.
I had some scrap lattice from a previous project that I used for my own doors.
Create the outer frame
Information technology's pretty difficult to get the angled edges of a chevron or herringbone pattern to brand a perfectly directly line, so adding a simple frame around the door first really helps everything line upwards more than neatly.
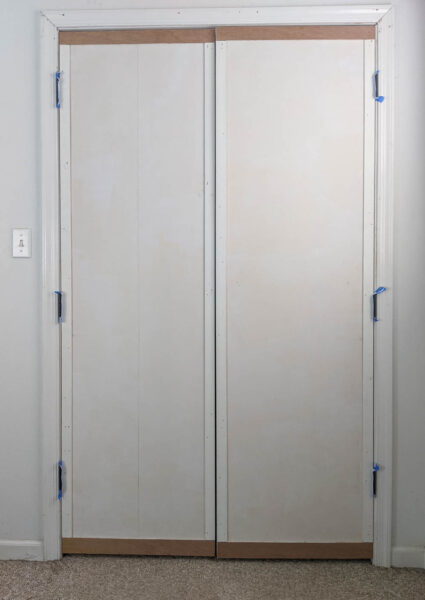
Cut each board to the right length and then attach information technology using wood glue and nails.
For wood plank walls, I typically skip the wood glue and just apply nails to hold the planks in place. This style it'southward a lot easier to remove them in the future if needed. But since this time I'k working on doors that will be regularly opened and closet, I decided to use both mucilage and nails to aid keep everything firmly attached.
A nail gun makes a project like this become so much faster. I have this Ryobi nail gun and I'm a big fan. It'southward very easy to use and doesn't require an air compressor. If you don't have a nail gun, you can use a hammer and nails instead, but information technology will accept a lot more fourth dimension.
Cutting your wood planks
When working with big sheets of plywood, I unremarkably accept them cut it into smaller strips in the shop to make it easier to ship home. They may exist willing to cut it into 4″ wide strips for you right in the store, but I unremarkably just have them cut the board into half or fourths and cut information technology the rest of the way at home.
You can cut your own wood into strips using a circular saw or a table saw. I constitute 4″ strips to be a expert size but you could always make yours larger or smaller depending on the look you prefer.
Once your wood is cut into strips, use a miter saw to cut a 45 caste angle at ane end of each strip.
I find it works best to cut half of the strips and then suit the saw to cutting a 45 degree angle in the other direction for the second half of the strips.
Because underlayment isn't the highest quality forest, 1 side is normally nicer than the other. Cutting the angles from different directions this way makes it easier to keep the skilful side facing up as you lay out your pattern.
Be sure to sand each cut edge to remove whatever rough edges.
Begin the chevron pattern
Use a tape measure and a straight edge to draw a line down the center of each door.
To first the chevron design, line upwardly the angled edges of ii wood planks and then they meet on this straight line.
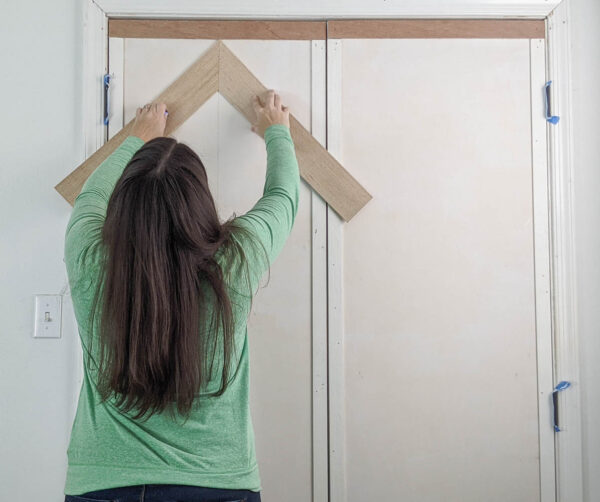
Use a speed square to make sure that each lath is exactly 45 degrees from the top of the door.
It'due south really of import to make sure these starting time two boards are lined up correctly because they are setting the pattern for the whole rest of the door. If they are off-center or fastened at the wrong angle, you will take to fight with every other board going down the door to go information technology correctly placed.
While holding each board in identify, utilise the speed square or some other straight edge to marking where the second end meets the door frame.
Cut along this marking with your miter saw. One time the first row is cut, double-check the fit and and then attach each board using woods glue and nails.
Proceed the design
Continue down the door, cutting and attaching the forest planks equally yous go.
As you tin see in the photograph in a higher place, I started out using pennies equally spacers to create a small-scale gap between each board. You don't want the boards to be completely affluent with ane another or the chevron pattern will exist somewhat lost once the doors are painted.
After the get-go couple of rows, I realized the pennies really weren't necessary and were just getting in the fashion. For the rest of the wood planks, I simply made certain to leave a tiny gap betwixt each board as I attached them.
It would save a lot of fourth dimension to only cut all of the forest strips the aforementioned size from the beginning, but I constitute I got a much better fit by measuring and cut each strip to the correct angle individually.
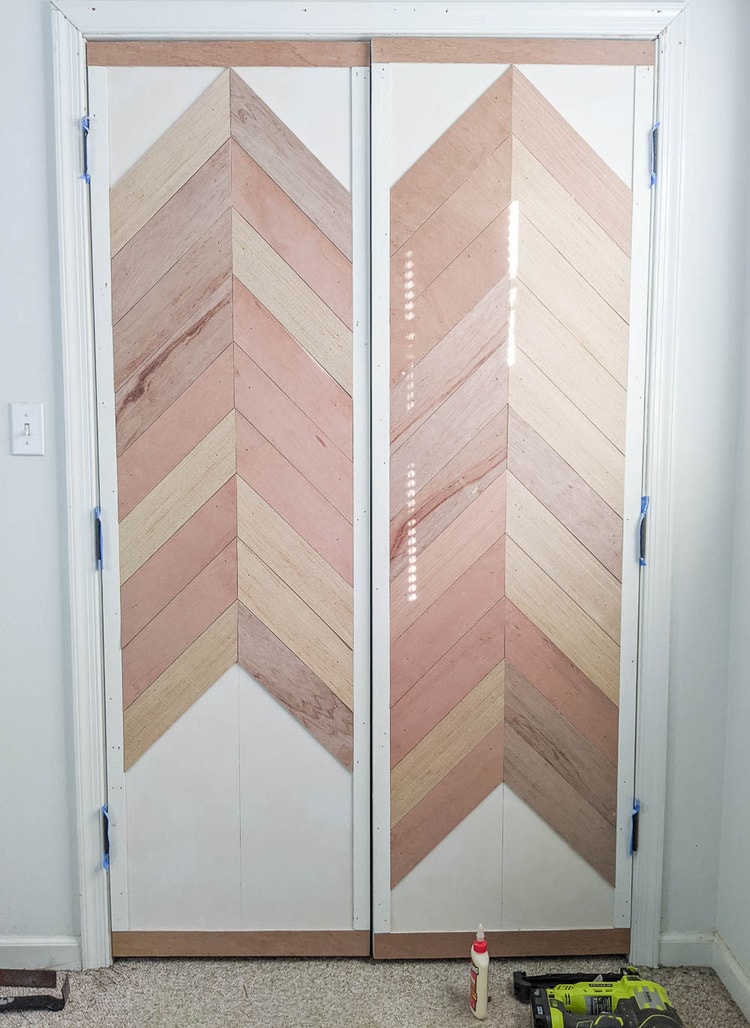
When y'all reach the bottom of the door, in that location will be a few odd shaped pieces to cut to complete the pattern all the way to the corners. But proceed to marking where each piece needs to be cut and cut it with your miter saw.
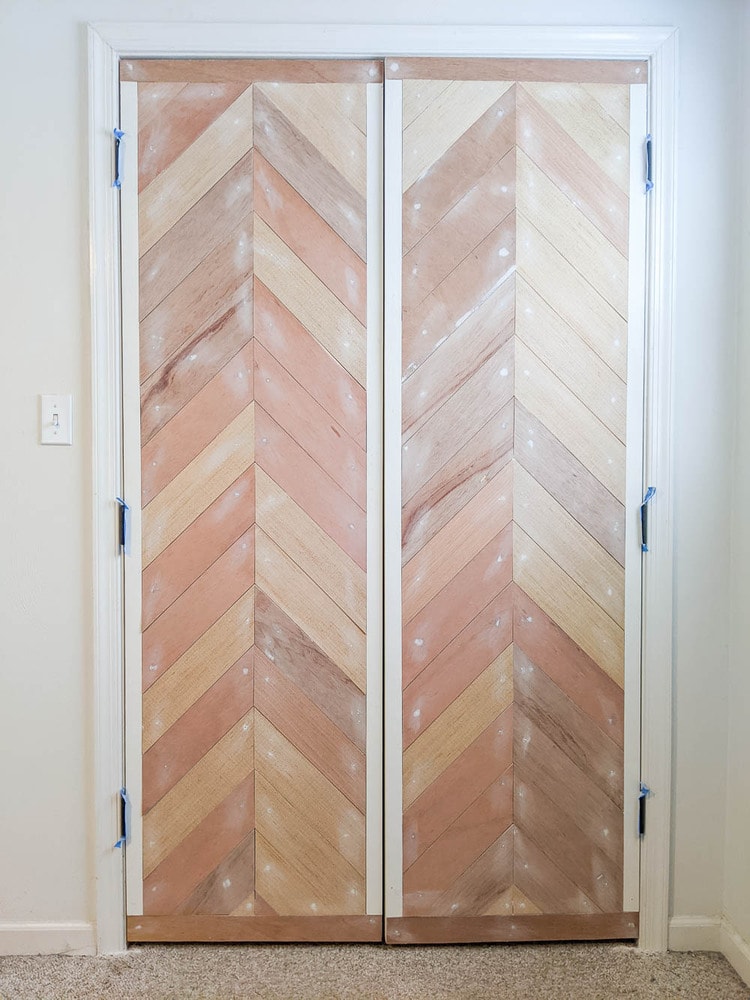
Fill the smash holes
Before painting, I filled all of the tiny nail holes in my door with spackling. At the same time I besides filled a few modest areas where the forest looked a bit ragged along the cut edges.
Once the spackling dried, I sanded it smooth with 220 grit sandpaper.
Paint the doors
At present y'all are ready to pigment!
I protected the hinges with painter's tape. Then I used my favorite angled pigment brush to paint effectually the edges of the doors and filled in with a small foam pigment roller.
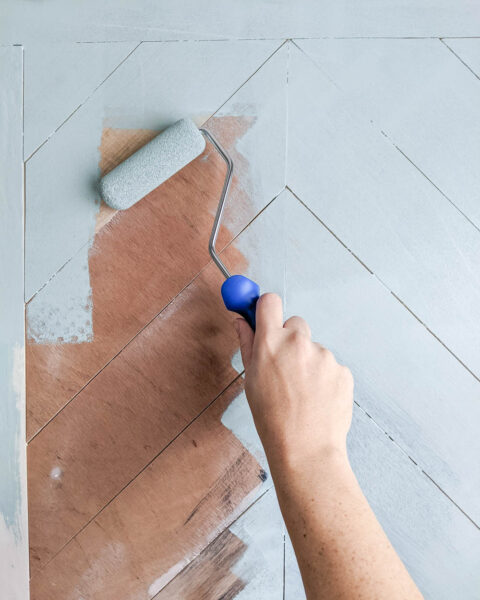
I painted my doors the colour Watery by Sherwin Williams because I really wanted them to make a statement. It's a beautiful blue with hints of green and grey besides. If you would prefer for your doors to be a bit more subtle, they would as well look cute painted white.
Once the paint dried, yous tin use a utility knife or paint scraper to gently remove any pigment that may have accumulated between the woods planks. This is 1 of those pocket-size details that will make your finished doors look professionally built.
Add the handles
The last step is to predrill holes and add the handle or handles.
I used these handles from Amazon and I'chiliad actually happy with them. They wait great and are super affordable.
Chevron Woods Plank Doors
And here they are – my cute 'new' closet doors!
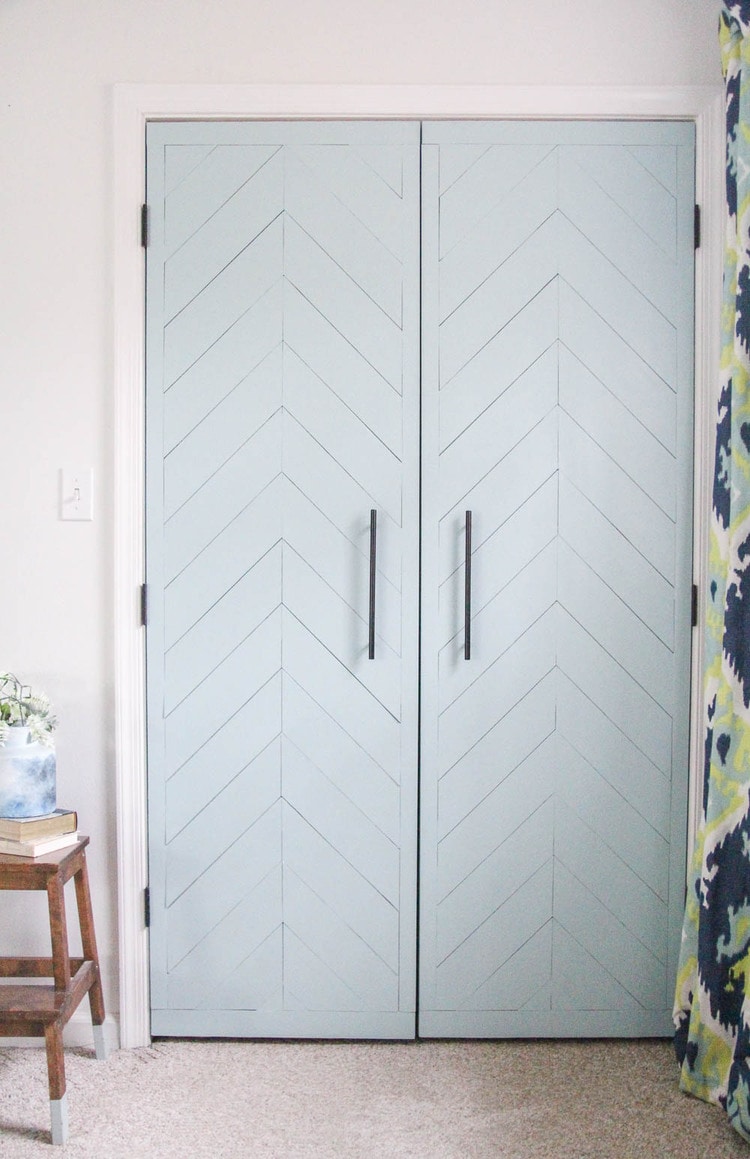
I admittedly dearest them!
I love that they open fully now, unlike when they were sliding doors and I could only see ane side of the closet at a time. I love how fresh and beautiful they look. And I love that I was able to upcycle my old doors to make these!
Time and Toll
This wasn't a super quick project; but it can easily exist washed in a weekend. It took near 6 hours to cut and adhere all of the forest for this door, pigment the door, and add the handles.
For such a huge transformation, it was very affordable. The price for the plywood and paint came to $40.
Combining this with the cost for the first half of this project, converting the sliding doors to hinged doors, brings the total toll for this sliding closet door makeover to $70. Not bad because the loftier price of even the almost bones replacement doors.
Adjacent step: tackling the mess inside that cupboard with a DIY closet organizer !
Video Tutorial
If yous adopt to see things done, this video shows the unabridged closet door makeover start to cease.
I'd beloved for you tosubscribe to my Youtube channel!
Other DIY ideas I think you'll similar:
- How to Completely Transform your Sliding Closet Doors
- How to DIY a Herringbone Forest Wall on a Budget
- How to Make a Stunning DIY Woods Plank Wall
- Our Modern Sliding Barn Door
I'd beloved for you to pin this mail service on Pinterest!

Materials
- apartment console door
- 1/4" thick x 2" broad strips of wood to frame the door face
- i/4" thick ten iv" broad strips of wood for the chevron pattern
- pencil
- wood glue
- spackling
- 220 grit sandpaper
- paint in the color of your choice
- door handles
- cream paint roller
- paint brush
Tools
- nail gun
- circular saw or table saw
- miter saw
- speed foursquare
- tape measure
- straight border
- utility pocketknife or paint scraper
- drill
Instructions
- Cut the wood to the correct length to grade the outer frame.
- Attach information technology using wood glue and nails.
- Cut your wood planks into 4" strips with a round or table saw.
- Use a miter saw to cut a 45 degree bending at i end of each strip.
- Sand each cutting border to remove any crude edges.
- Use a tape measure and a straight edge to describe a line down the center of each door.
- Line up the angled edges of 2 wood planks to meet on this straight line.
- Use a speed square to make sure that each board is exactly 45 degrees from the top of the door.
- Hold each board in place, utilize the speed square or some other direct border to marking where the second finish meets the door frame.
- Cut along this marking with your miter saw.
- Adhere each board using woods gum and nails.
- Keep cutting and attaching the wood planks this fashion as you move down the door.
- Fill in the boom holes with spackling.
- Sand with 220 grit sandpaper to smooth the spackling and any rough edges.
- Tape off the hinges and pigment the doors the color of your choice with a cream pigment roller.
- Use a utility knife or paint scraper to remove whatever paint that puddles between the wood planks for a smoother look.
- Add your handles.
Source: https://www.lovelyetc.com/closet-door-makeover/
Post a Comment for "How to Draw Moving Closet Door on Plan"